

-
Introduction to Pfumvudza and Conservation Agriculture4 Kappaleet
-
Planning and Preparing the Pfumvudza Plot4 Kappaleet
-
Soil Management and Mulching4 Kappaleet
-
Digging Planting Basins (Planting Holes)4 Kappaleet
-
Sowing and Planting Techniques4 Kappaleet
-
Crop Management and Care4 Kappaleet
-
Harvesting and Post-Harvest Handling4 Kappaleet
-
Climate Resilience and Sustainability Practices4 Kappaleet
-
Economic and Social Aspects4 Kappaleet
-
Practical Field Sessions and Demonstrations4 Kappaleet
-
Partnership with Finnish education experts2 Kappaleet
Osallistujat 12
Group Exercises: Measuring, Digging, and Mulching

Jukka 9.5.2025
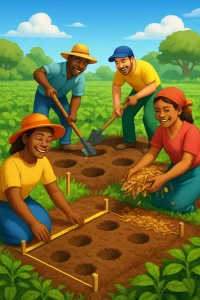
Welcome, adventurous farmers! In this exciting topic of our Practical Field Sessions, we are diving into the hands-on activities that are at the core of the Pfumvudza method. Think of this as an empowerment exercise for your green-thumb skills. Gather your fellow mentors and mentees as we embark on interactive group exercises that revolve around crucial tasks—measuring, digging, and mulching. Let’s get your fingers in the soil, shall we?
Objective
The goal of today’s highlighted exercises is not just practical know-how but also camaraderie and teamwork. We will collaboratively measure, dig planting stations, and cover our plots with a rich layer of mulch. Together, we shall create the perfect foundation for a bountiful harvest! 🌱🍂
Exercise 1: Measuring
Step 1: Prepare the Plot
Materials Needed:
- Permanent pegs
- Measuring tape or a ruler
- Marker for your boundaries
To kick off our journey, we’ll be marking out our field: a mere 39m × 16m plot yields the promise of a fruity harvest. Before anything else, ensure your field is weed-free and clean from residual crops. As farmers, clarity in space symbolizes clarity in productivity! Using your measuring tape and permanent pegs, mark out the corners of your glorious plot. Envision your harvest taking shape!
Step 2: Ring of Trust
Form a circle and share your insights on the measurements. What does this plot mean to you? What potential does it hold? Sharing is not only caring—it’s about building trust and enhancing collective resilience in farming.
Exercise 2: Digging Planting Stations
Step 1: Pick up the Tools
Materials Needed:
- Hoes or digging tools
- Measuring rods
- An enthusiastic group!
Alright, my fellow earth warriors! It’s time to dig! With your plots marked, we will create 52 rows across the slope of your field, spaced uniquely 75cm apart. Using measuring rods will ensure uniformity, thus boosting our future harvest.
Step 2: The Digging Plan
Depending on how fast teamwork can flow, each group will be assigned specific sections of the field to dig planting stations. Each 16m row will host 28 planting stations, strategically tunneled, and approached with care.
In total, that’s 1456 stations per plot. Imagine the magical transformation in the earth as your tools penetrate it, creating space to nurture life! Bring your energy and rhythm to the digging! Let’s hum a tune as we dig and chant “Plant and Prosper!” together, making it an enjoyable experience.
Step 3: Swap and Share
Rotate tasks among teams—let the advocates of precision take part in digging, while the creatives can direct the rhythm. This will foster skills and enhance motivation. Share tips you’ve learned along the way!
Exercise 3: Mulching
Step 1: Gather Your Mulch
Materials Needed:
- Natural mulch (dried leaves, straw, or grass cuttings)
- Watering cans for moisture
A mulch layer is like a cozy blanket for your crop, protecting it from harsh weather and helping retain moisture. Gather your mulch materials and feel the connection with Mother Nature as you prep the plot.
Step 2: Blanket the Ground
Spread the mulch generously across the dug areas, ensuring a comprehensive cover that encourages moisture retention. Your mission is to prepare the ground for a nourishing growth phase ahead.
Step 3: Reflect
Once again, gather in a circle after mulching. Reflect on your experience. How did teamwork enhance your performance? How did you feel connecting with the soil? This reflection is fundamental to learning and bounds us closer as ones committed to farming.
As our Group Exercise concludes, you’ve not only engaged your hands in vital agricultural practices but also reinforced your bonds as a community of farmers. Remember, the Pfumvudza approach isn’t just cultivating land but cultivating hope, resilience, and bountiful friendships. So keep nurturing your plots with love and joy—not just today but every season to come! Together, let’s harvest a future that’s bright! 🌾✨